Hello World#
NVIDIA Omniverse™ Kit, the toolkit that NVIDIA Isaac Sim uses to build its applications, provides a Python interpreter for scripting. This means every single GUI command, as well as many additional functions are available as Python APIs. However, the learning curve for interfacing with Omniverse Kit using Pixar’s USD Python API is steep and steps are frequently tedious. Therefore we’ve provided a set of APIs that are designed to be used in robotics applications, APIs that abstract away the complexity of USD APIs and merge multiple steps into one for frequently performed tasks.
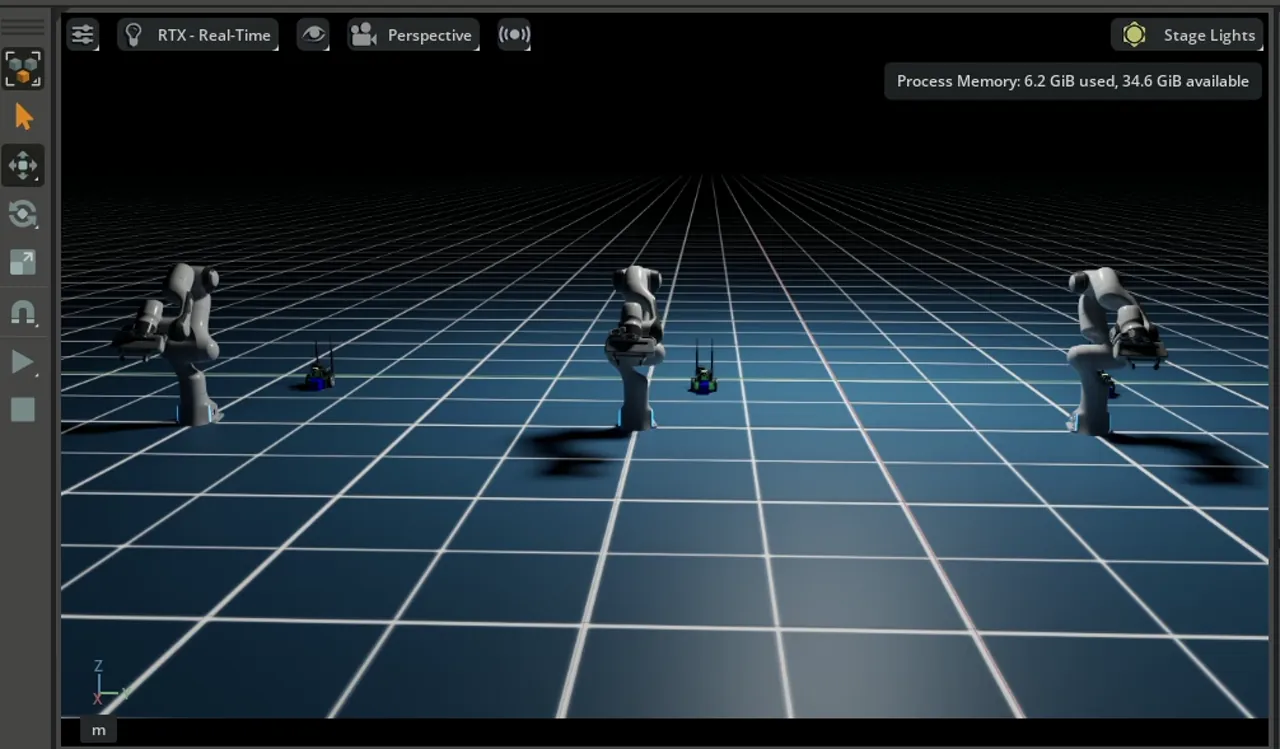
In this tutorial, we will present the concepts of Core APIs and how to use them. We will start with adding a cube to an empty stage, and we’ll build upon it to create a scene with multiple robots executing multiple tasks simultaneously, as seen below.
Learning Objectives#
This tutorial series introduces the Core API. After this tutorial, you learn:
How to use the Core APIs to manipulate the USD stage.
How to add a rigid body to the Stage and simulate it using Python in NVIDIA Isaac Sim.
The difference between running Python in an Extension Workflow vs a Standalone Workflow.
10-15 Minute Tutorial
Getting Started#
Prerequisites
Intermediate knowledge in Python and asynchronous programming is required for this tutorial.
Please download and install Visual Studio Code prior to beginning this tutorial.
Please review Quick Tutorials and Workflows prior to beginning this tutorial.
Begin by opening the Hello World example. First activate Windows > Examples > Robotics Examples which will open the Robotics Examples tab.
Click Robotics Examples > General > Hello World.
Verify that the window for the Hello World example extension is visible in the workspace.
Click the Open Source Code button to launch the source code for editing in Visual Studio Code.
Click the Open Containing Folder button to open the directory containing the example files.
This folder contains three files: hello_world.py, hello_world_extension.py, and __init__.py.
The hello_world.py script is where the logic of the application will be added, while the UI
elements of the application will be added in hello_world_extension.py script and thus
linked to the logic.
Click the LOAD button to load the World.
click File > New From Stage Template > Empty to create a new stage, click Don’t Save when prompted to save the current stage.
Click the LOAD button to load the World again.
Open
hello_world.pyand press “Ctrl+S” to use the hot-reload feature. You will notice that the menu disappears from the workspace (because it was restarted).Open the example menu again and click the LOAD button.
Now you can begin adding to this example.
Code Overview#
This example inherits from BaseSample, which is a boilerplate extension application that sets up the basics for every robotics extension application. The following are a few examples of the actions BaseSample performs:
Loading assets into the stage using a button.
Clearing the stage when a new stage is created.
Resetting objects to their default states.
Handling hot reloading.
 1import isaacsim.core.experimental.utils.stage as stage_utils
 2from isaacsim.examples.base.base_sample_experimental import BaseSample
 3from isaacsim.storage.native import get_assets_root_path
 4
 5
 6class HelloWorld(BaseSample):
 7    def __init__(self) -> None:
 8        super().__init__()
 9
10    # This function is called to setup the assets in the scene for the first time
11    def setup_scene(self):
12        # Add ground plane directly to the stage
13        ground_plane = stage_utils.add_reference_to_stage(
14            usd_path=get_assets_root_path() + "/Isaac/Environments/Grid/default_environment.usd",
15            path="/World/ground",
16        )
Key Concepts#
Stage Utilities: The stage_utils module provides functions for directly manipulating the USD stage,
such as adding references, creating prims, and managing stage hierarchy.
Prim Classes: The API provides prim wrapper classes like RigidPrim, GeomPrim,
and Articulation that give you direct control over USD prims with physics capabilities.
SimulationManager: For callbacks and simulation events, the SimulationManager class provides
methods to register and deregister callbacks for various simulation events.
Adding to the Scene#
Use the Python API to add a cube as a rigid body to the scene. With the Core APIs, create the geometry first, then apply collision and rigid body properties.
 1import isaacsim.core.experimental.utils.stage as stage_utils
 2import numpy as np
 3from isaacsim.core.experimental.materials import PreviewSurfaceMaterial
 4from isaacsim.core.experimental.objects import Cube
 5from isaacsim.core.experimental.prims import GeomPrim, RigidPrim
 6from isaacsim.examples.base.base_sample_experimental import BaseSample
 7from isaacsim.storage.native import get_assets_root_path
 8
 9
10class HelloWorld(BaseSample):
11    def __init__(self) -> None:
12        super().__init__()
13
14    def setup_scene(self):
15        # Add ground plane
16        ground_plane = stage_utils.add_reference_to_stage(
17            usd_path=get_assets_root_path() + "/Isaac/Environments/Grid/default_environment.usd",
18            path="/World/ground",
19        )
20
21        # Create a blue visual material for the cube
22        visual_material = PreviewSurfaceMaterial("/World/Materials/blue")
23        visual_material.set_input_values("diffuseColor", [0.0, 0.0, 1.0])
24
25        # Create the cube geometry
26        self._cube_shape = Cube(
27            paths="/World/fancy_cube",
28            positions=np.array([[0.0, 0.0, 1.0]]),  # Starting position 1m above ground
29            sizes=[1.0],
30            scales=np.array([[0.5015, 0.5015, 0.5015]]),  # Scale the cube
31            reset_xform_op_properties=True,
32        )
33
34        # Apply collision APIs to enable physics collision
35        GeomPrim(paths=self._cube_shape.paths, apply_collision_apis=True)
36
37        # Make it a rigid body (dynamic object that responds to physics)
38        self._cube = RigidPrim(paths=self._cube_shape.paths)
39
40        # Apply the blue material
41        self._cube_shape.apply_visual_materials(visual_material)
Press Ctrl+S to save the code and hot-reload NVIDIA Isaac Sim.
Open the menu again.
click File > New From Stage Template > Empty, then the LOAD button. You need to perform this action if you change anything in the setup_scene. Otherwise, you only need to press the LOAD button.
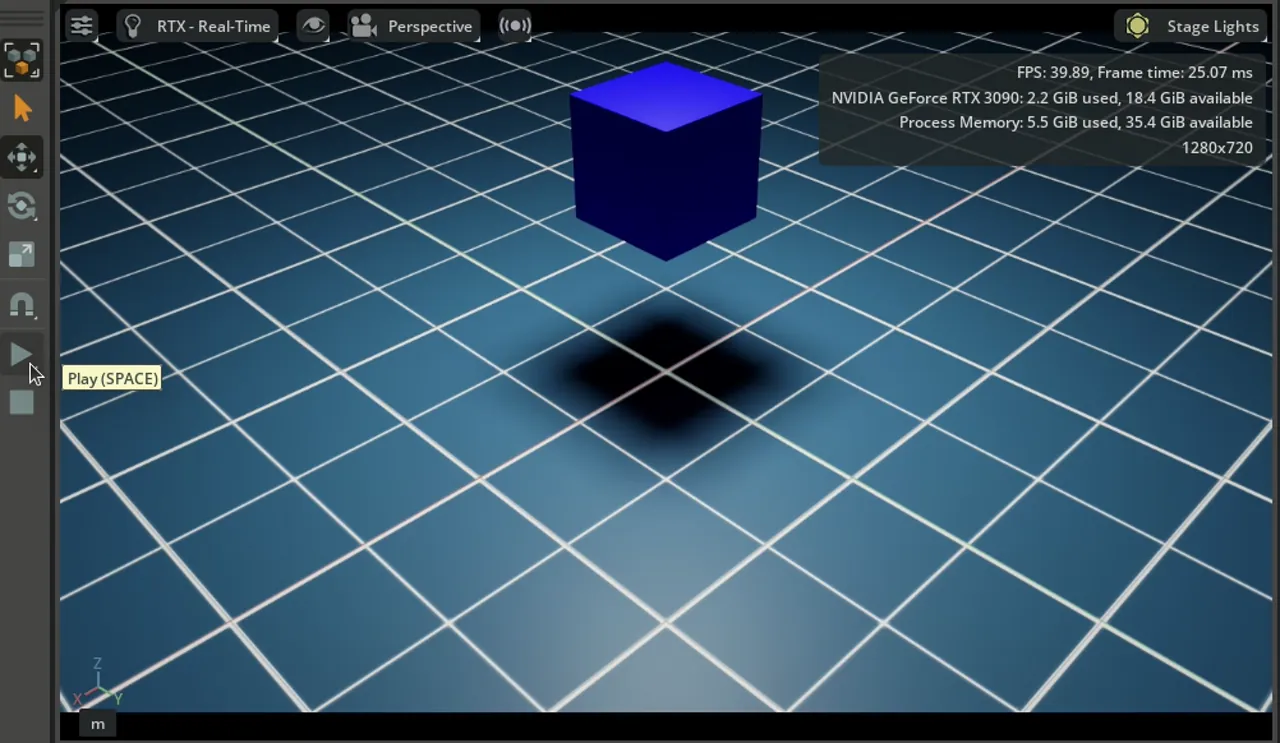
See the dynamic cube falling as the simulation starts automatically.
Note
Every time the code is edited or changed, press Ctrl+S to save the code and hot-reload NVIDIA Isaac Sim.
Understanding the Prim Classes#
The experimental API uses a layered approach to create physics-enabled objects:
Cube (or other shape classes): Creates the visual geometry on the USD stage.
GeomPrim: Wraps the geometry and can apply collision APIs for physics interactions.
RigidPrim: Adds rigid body dynamics, making the object respond to gravity and forces.
This modular approach gives you fine-grained control - you can create static colliders (GeomPrim without RigidPrim) or fully dynamic objects (with both).
Inspecting Object Properties#
Print the world pose and velocity of the cube. The highlighted lines show how you can query object properties.
 1import isaacsim.core.experimental.utils.stage as stage_utils
 2import numpy as np
 3from isaacsim.core.experimental.materials import PreviewSurfaceMaterial
 4from isaacsim.core.experimental.objects import Cube
 5from isaacsim.core.experimental.prims import GeomPrim, RigidPrim
 6from isaacsim.examples.base.base_sample_experimental import BaseSample
 7from isaacsim.storage.native import get_assets_root_path
 8
 9
10class HelloWorld(BaseSample):
11    def __init__(self) -> None:
12        super().__init__()
13
14    def setup_scene(self):
15        # Add ground plane
16        ground_plane = stage_utils.add_reference_to_stage(
17            usd_path=get_assets_root_path() + "/Isaac/Environments/Grid/default_environment.usd",
18            path="/World/ground",
19        )
20
21        # Create a blue visual material for the cube
22        visual_material = PreviewSurfaceMaterial("/World/Materials/blue")
23        visual_material.set_input_values("diffuseColor", [0.0, 0.0, 1.0])
24
25        # Create the cube geometry
26        self._cube_shape = Cube(
27            paths="/World/fancy_cube",
28            positions=np.array([[0.0, 0.0, 1.0]]),
29            sizes=[1.0],
30            scales=np.array([[0.5015, 0.5015, 0.5015]]),
31            reset_xform_op_properties=True,
32        )
33
34        # Apply collision and rigid body
35        GeomPrim(paths=self._cube_shape.paths, apply_collision_apis=True)
36        self._cube = RigidPrim(paths=self._cube_shape.paths)
37        self._cube_shape.apply_visual_materials(visual_material)
38
39    # This function is called after load button is pressed
40    # It's called after setup_scene and after one physics time step
41    # to propagate physics handles needed to retrieve physical properties
42    async def setup_post_load(self):
43        # Query cube properties using RigidPrim methods
44        positions, orientations = self._cube.get_world_poses()
45        # get_velocities() returns a tuple: (linear_velocities, angular_velocities)
46        linear_velocities, angular_velocities = self._cube.get_velocities()
47
48        # Convert from warp arrays to numpy for printing
49        # Note: experimental APIs return batched results (even for single objects)
50        print("Cube position is : " + str(positions.numpy()[0]))
51        print("Cube's orientation is : " + str(orientations.numpy()[0]))
52        print("Cube's linear velocity is : " + str(linear_velocities.numpy()[0]))
Note
The experimental APIs return batched results as warp arrays. Use .numpy() to convert
them to numpy arrays, and index with [0] to get the first (and only) element when
working with a single object.
Continuously Inspecting the Object Properties during Simulation#
Print the world pose and velocity of the cube during simulation at every physics step executed. As mentioned in Workflows, in this workflow the application is running asynchronously and can’t control when to step physics. However, you can add callbacks to ensure certain things happen before certain events.
Add a physics callback using the SimulationManager:
 1import isaacsim.core.experimental.utils.stage as stage_utils
 2import numpy as np
 3from isaacsim.core.experimental.materials import PreviewSurfaceMaterial
 4from isaacsim.core.experimental.objects import Cube
 5from isaacsim.core.experimental.prims import GeomPrim, RigidPrim
 6from isaacsim.core.simulation_manager import SimulationManager
 7from isaacsim.examples.base.base_sample_experimental import BaseSample
 8from isaacsim.storage.native import get_assets_root_path
 9
10
11class HelloWorld(BaseSample):
12    def __init__(self) -> None:
13        super().__init__()
14        self._physics_callback_id = None
15
16    def setup_scene(self):
17        # Add ground plane
18        ground_plane = stage_utils.add_reference_to_stage(
19            usd_path=get_assets_root_path() + "/Isaac/Environments/Grid/default_environment.usd",
20            path="/World/ground",
21        )
22
23        # Create a blue visual material for the cube
24        visual_material = PreviewSurfaceMaterial("/World/Materials/blue")
25        visual_material.set_input_values("diffuseColor", [0.0, 0.0, 1.0])
26
27        # Create the cube geometry
28        self._cube_shape = Cube(
29            paths="/World/fancy_cube",
30            positions=np.array([[0.0, 0.0, 1.0]]),
31            sizes=[1.0],
32            scales=np.array([[0.5015, 0.5015, 0.5015]]),
33            reset_xform_op_properties=True,
34        )
35
36        # Apply collision and rigid body
37        GeomPrim(paths=self._cube_shape.paths, apply_collision_apis=True)
38        self._cube = RigidPrim(paths=self._cube_shape.paths)
39        self._cube_shape.apply_visual_materials(visual_material)
40
41    async def setup_post_load(self):
42        # Register a physics callback using SimulationManager
43        from isaacsim.core.simulation_manager.impl.isaac_events import IsaacEvents
44
45        self._physics_callback_id = SimulationManager.register_callback(
46            self.print_cube_info, IsaacEvents.POST_PHYSICS_STEP
47        )
48
49    # Physics callback function - called after each physics step
50    # Takes dt (delta time) and context as arguments
51    def print_cube_info(self, dt, context):
52        positions, orientations = self._cube.get_world_poses()
53        linear_velocities, angular_velocities = self._cube.get_velocities()
54
55        print("Cube position is : " + str(positions.numpy()[0]))
56        print("Cube's orientation is : " + str(orientations.numpy()[0]))
57        print("Cube's linear velocity is : " + str(linear_velocities.numpy()[0]))
58
59    def physics_cleanup(self):
60        # Clean up callback when the extension is unloaded
61        if self._physics_callback_id is not None:
62            SimulationManager.deregister_callback(self._physics_callback_id)
63            self._physics_callback_id = None
Converting the Example to a Standalone Application#
Note
On windows use python.bat instead of python.sh
The details of how python.sh works below are similar to how python.bat works
As mentioned in Workflows, in this workflow, the robotics application is started when launched from Python right away.
Open a new
my_application.pyfile and add the following:
 1# Launch Isaac Sim before any other imports
 2# Default first two lines in any standalone application
 3from isaacsim import SimulationApp
 4
 5simulation_app = SimulationApp({"headless": False})  # we can also run as headless
 6
 7# Now import Isaac Sim modules
 8import isaacsim.core.experimental.utils.stage as stage_utils
 9import numpy as np
10import omni.timeline
11from isaacsim.core.experimental.materials import PreviewSurfaceMaterial
12from isaacsim.core.experimental.objects import Cube
13from isaacsim.core.experimental.prims import GeomPrim, RigidPrim
14from isaacsim.core.simulation_manager import SimulationManager
15from isaacsim.storage.native import get_assets_root_path
16
17# Add ground plane
18ground_plane = stage_utils.add_reference_to_stage(
19    usd_path=get_assets_root_path() + "/Isaac/Environments/Grid/default_environment.usd",
20    path="/World/ground",
21)
22
23# Create a blue visual material for the cube
24visual_material = PreviewSurfaceMaterial("/World/Materials/blue")
25visual_material.set_input_values("diffuseColor", [0.0, 0.0, 1.0])
26
27# Create the cube geometry
28cube_shape = Cube(
29    paths="/World/fancy_cube",
30    positions=np.array([[0.0, 0.0, 1.0]]),
31    sizes=[1.0],
32    scales=np.array([[0.5, 0.5, 0.5]]),
33    reset_xform_op_properties=True,
34)
35
36# Apply collision and rigid body
37GeomPrim(paths=cube_shape.paths, apply_collision_apis=True)
38cube = RigidPrim(paths=cube_shape.paths)
39cube_shape.apply_visual_materials(visual_material)
40
41# Start the timeline (physics simulation)
42omni.timeline.get_timeline_interface().play()
43simulation_app.update()
44
45# Run the simulation loop
46for i in range(50):
47    # Only query when physics is actively simulating
48    if SimulationManager.is_simulating():
49        positions, orientations = cube.get_world_poses()
50        linear_velocities, angular_velocities = cube.get_velocities()
51
52        # Will be shown on terminal
53        print("Cube position is : " + str(positions.numpy()[0]))
54        print("Cube's orientation is : " + str(orientations.numpy()[0]))
55        print("Cube's linear velocity is : " + str(linear_velocities.numpy()[0]))
56
57    # Step the app (physics + rendering)
58    simulation_app.update()
59
60simulation_app.close()  # close Isaac Sim
Run it using
./python.sh ./exts/isaacsim.examples.interactive/isaacsim/examples/interactive/user_examples/my_application.py.
Summary#
This tutorial covered the following topics:
Overview of the Core APIs for direct stage manipulation.
Using
stage_utilsto add assets to the stage.Creating dynamic objects with
Cube,GeomPrim, andRigidPrim.Registering physics callbacks with
SimulationManager.Accessing dynamic properties for objects using prim wrapper methods.
The main differences in a standalone application.
Next Steps#
Continue to Hello Robot to learn how to add a robot to the simulation.
Note
The next tutorials will be developed mainly using the extensions application workflow. However, conversion to other workflows is similar given what was covered in this tutorial.