ROS 2 Cameras#
Learning Objectives#
In this example, you learn how to:
Add additional cameras to the scene and onto the robot
Add camera publishers in Omnigraph
Add camera publishers using the menu shortcut
Send ground truth synthetic perception data through rostopics
Getting Started#
Prerequisite
Completed ROS 2 Installation: installed ROS 2, enabled the ROS 2 extension, built the provided Isaac Sim ROS 2 workspace, and set up the necessary environment variables.
Basic understanding of ROS topics and how publisher and subscriber works.
Completed tutorial on Isaac Sim Omnigraph Tutorial and Tutorial 4: Add Camera and Sensors to a Robot.
Completed URDF Import: Turtlebot so that there is a Turtlebot ready on stage.
Note
In Windows 10 or 11, depending on your machine’s configuration, RViz2 might not open properly.
Camera Publisher#
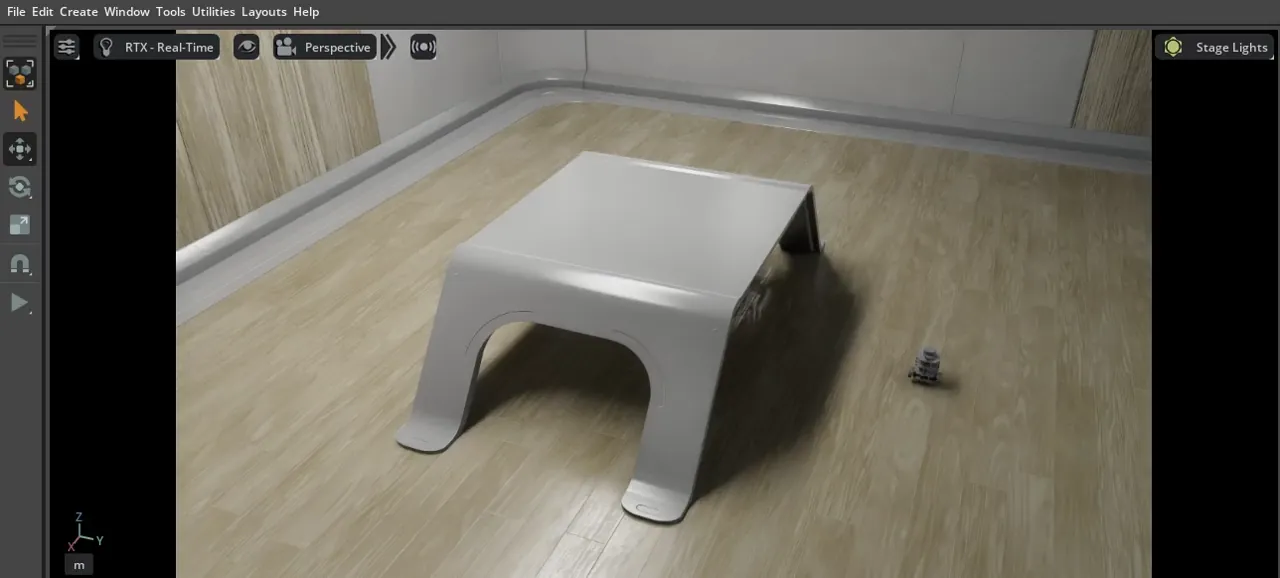
Setting Up Cameras#
The default camera displayed in the Viewport is the Perspective camera. You can verify that by the Camera button on the top left hand corner inside the Viewport display. Click on the Camera button and you will observe that there are a few other preset camera positions:
Top
Front
Right side views
For this tutorial, you will add two stationary cameras, naming them Camera_1 and Camera_2, viewing the room from two different perspectives. The procedures for adding cameras to the stage can be found in Tutorial 4: Add Camera and Sensors to a Robot.
Open additional Viewports to observe multiple camera views at the same time. To open additional Viewports:
Window > Viewports > Viewport 2 to open the viewport
Select the desired camera view from the Cameras button on the upper left corner in the viewport.
Building the Graph for an RGB Publisher#
Open the Graph Editors, Window > Graph Editors > Action Graph.
Click on the New Action Graph Icon in middle of the Action Graph window, or Edit Action Graph if you want to append the camera publisher to an existing action graph.
Build an Action Graph with:
the nodes and connection of the following image
the parameters of the table below
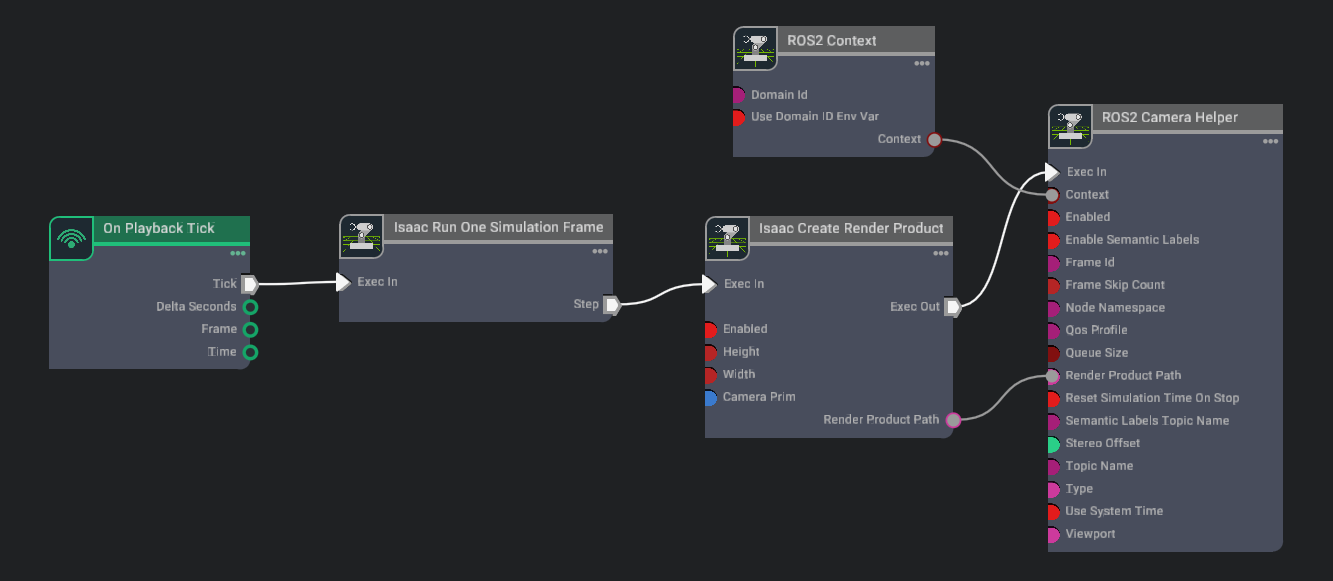
Parameters:
Node
Input Field
Value
Isaac Create Render Product
cameraPrim
/World/Camera_1
enabled
True
ROS 2 Camera Helper
type
rgb
topicName
rgb
frameId
turtle
Ticking this graph will automatically create a new render product assigned to Camera_1.
Graph Explained#
On Playback Tick Node: Producing a tick when simulation is “Playing”. Nodes that receives ticks from this node will execute their compute functions every simulation step.
ROS 2 Context Node: ROS 2 uses DDS for its middleware communication. DDS uses Domain ID to allow for different logical networks operate independently even though they share a physical network. ROS 2 nodes on the same domain can freely discover and send messages to each other, while ROS 2 nodes on different domains cannot. ROS 2 context node creates a context with a given Domain ID. It is set to 0 by default. If Use Domain ID Env Var is checked, it will import the
ROS_DOMAIN_IDfrom the environment in which you launched the current instance of Isaac Sim.Isaac Create Render Product: Creating a render product prim, which acquires the rendered data from the given camera prim and outputs the path to the render product prim. Rendering can be enabled and disabled on command by checking or unchecking the
enabledfield.Isaac Run One Simulation Frame: This node will make sure the pipeline is only ran once on start.
ROS 2 Camera Helper: Indicating the type of data to publish, and the rostopic to publish it on.
Camera Helper Node
The Camera Helper Node is abstracting a complex postprocessing network from the users.
After you press Play with a Camera Helper Node connected, when you click the icon on the upper left corner of the Action Graph window, you might observe that in the list of Action Graphs, a new one appears: /Render/PostProcessing/SDGPipeline.
This graph is automatically created by the Camera Helper Node. The pipeline retrieves relevant data from the renderer, processes it, and sends them to the corresponding ROS publisher. This graph is only created in the session you are running. It will not be saved as part of your asset and will not appear in the Stage tree.
Depth and Other Perception Ground Truth Data#
In addition to RGB images, the following synthetic sensor and perceptual information are also available for any camera:
Depth
Point Cloud
To observe the units used for each synthetic data annotator refer to omni.replicator.
Before publishing the following bounding box and labels, review the Isaac Sim Replicator Tutorials to learn about semantically annotating scenes.
Note
If you would like to use the BoundingBox publisher nodes, which are dependent on vision_msgs, ensure it is installed on the system or try Configuring Options and Enabling Internal ROS Libraries.
BoundingBox 2D Tight
BoundingBox 2D Loose
BoundingBox 3D
Semantic labels
Instance Labels
Each Camera Helper node can only retrieve one type of data. You can indicate what type you want to assign to the node in the dropdown menu for the field type in the Camera Helper Node’s Property tab.
Note
After you specify a type for a Camera Helper node and activate it (that is, started simulation and the underlying SDGPipeline has been generated), you cannot change the type and reuse the node. You can use a new node or reload your stage and regenerate the SDGPipeline with the modified type.
An example of publishing multiple Rostopics for multiple cameras can be found by going to the Isaac Sim Content Browser, Isaac Sim>Samples>ROS2>Scenario>turtlebot_tutorial.usd.
Camera Info Helper Node#
The Camera Info Helper publisher node uses the following equations to calculate the K, P, and R camera intrinsic matrices.
Parameter calculations:
\(fx = width * focalLength / horizontalAperture\)
\(fy = height * focalLength / verticalAperture\)
\(cx = width * 0.5\)
\(cy = height * 0.5\)
K Matrix (Matrix of intrinsic parameters)
The K matrix is a 3x3 matrix.
P Matrix (Projection Matrix)
For stereo cameras the stereo offset of the second camera with respect to the first camera in x and y are denoted as Tx and Ty. These values are computed automatically if two render products are attached to the node.
For monocular cameras \(Tx = Ty = 0\).
The P matrix is a 3x4 row-major matrix.
R Matrix (Rectification Matrix)
The R matrix is a rotation matrix applied to align the camera coordinate system with the ideal stereo image plane, ensuring that epipolar lines in both stereo images become parallel.
The R matrix is only used for stereo cameras and is set as a 3x3 matrix.
Graph Shortcut#
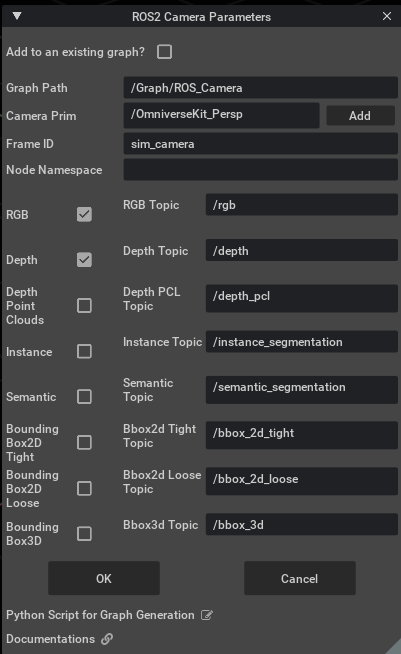
There is a menu shortcut to build multiple camera sensor graphs. Go to Tools > Robotics > ROS 2 OmniGraphs > Camera.
If you don’t observe any ROS 2 graphs listed, you need to enable the ROS 2 bridge. A popup box below will appear asking for the parameters needed to populate the graphs. You must provide the Graph Path, the Camera Prim, frameId, any Node Namespaces if you have one, and check the boxes for the data you want to publish.
If you want to add the graphs to an existing graph, check the Add to an existing graph? box. This will append the nodes to the existing graph, and use the existing tick node, context node, and simulation time node if they exist.
Verifying ROS Connection#
Use ros2 topic echo /<topic> to observe the raw information that is being passed along.
Visualize depth using the rqt_image_view method again: ros2 run rqt_image_view rqt_image_view /depth.
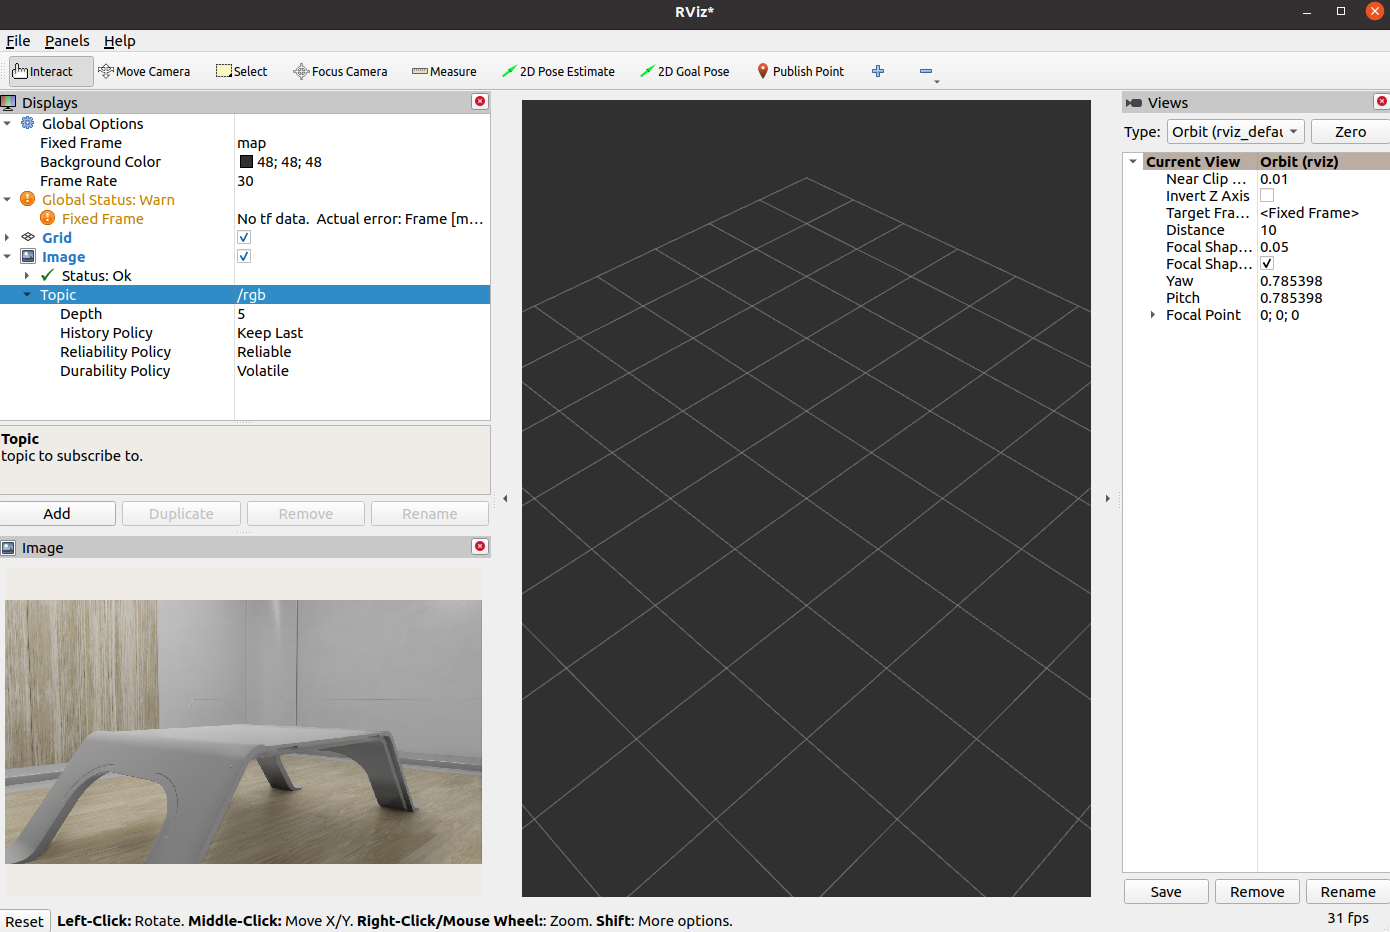
To verify that the images published this time in RViz2:
In a ROS 2-sourced terminal, type in the command
rviz2to open RViz.Add an Image display type and set the topic to
rgb.
Troubleshooting#
If your depth image only shows black and white sections, it is likely that the field of view has “infinite” depth and has skewed the contrast. Adjust your field of view so that the depth range in the image is limited.
Additional Publishing Options#
To publish images on demand or periodically at a specified rate, you will need to use Python scripting. Go to ROS 2 Camera for examples.
Summary#
This tutorial introduces how to publish camera and perception data in ROS 2.
Next Steps#
Review Publishing Camera’s Data to learn how to publish camera’s data through Python scripting.
Further Learning#
Additional information about synthetic data generation can be found in the Replicator Tutorial Series.
Examples of running similar environment using Standalone Python workflow is outlined here.